About 2 years ago I promised a close friend of mine that I would build the website for his lodge which was still in construction at the time. Back then, the only thing I knew about web development was basic HTML and some basic Flash animation. So basically, I was plunging myself into the deep end... and I like a challenge!
To cut a long story short, 2 years and 3 web site designs later, today the website went live! I have learned a lot and I'm sure there is still a lot to learn. The website is currently only in Romanian, as I still have to translate the English section. [EDIT 06/10/2008: The English section is now done.] For those of you interested in the design, please do check it out. I am open to comments, criticisms and advice.
Geeky stuff aside, the lodge is a wonderful place situated in the serene valley of the Aries river. It really is the ideal place to get away from it all. For those of you in or around Romania, you really should check it out!

Showing posts with label screenshot. Show all posts
Showing posts with label screenshot. Show all posts
Sunday, September 28, 2008

Monday, March 19, 2007
Getting Started with Linux Mint
Hi all!
This is my second post aimed at new users of the Linux Mint distribution. My first post is on installing a dual boot setup with Linux Mint and Windows XP. In this post I would like to talk you through some basic things one should know about using Linux Mint and generally just helping you to be productive in your new OS environment. I am going to direct my posts towards a single home PC connected to the Internet, with multiple users.
Although the desktop environment in modern day Linux is intuitive and more or less easy to navigate through for someone coming from Windows XP, we must keep in mind that the two OSs are different at the 'roots' even though at the surface they may seem similar. At first, the way somethings are done in Linux might seem quirky.
One immediate difference you will notice is that Linux always asks you for an administrator's password when performing changes to the system. This may seem like an annoyance coming from Windows but it is to make sure nobody makes changes that could break your system, including the administrator (by accident of course) and malicious software. However, to ease things up a bit, once entered, Linux Mint will maintain administrator mode for 15 minutes and will not ask you for the password in this period. The administrator is the user you created during the installation.
I urge you to persevere a little as once you have set everything up you will not be asked for the password unless system changes are required. And as you use Linux, you will (at least I did) realize that Linux today is an easy, secure and convenient solution for your computing needs. Let us move onto using Linux Mint.
mintMenu

Your primary interaction with your computer is the menu at the bottom left labeled 'Bianca'. This menu (mintMenu) is unique to Linux Mint and I must say they have developed a very easy and efficient menu system. The menu has been neatly divided into three sections - Places, System and Applications.
- The items under Places logically opens the file manager, Nautilus, in the respective locations.
- System houses the Application Installer (Synaptic Package Manager), the Control Center (mintConfig), Terminal, Lock and Quit dialogues. I shall expand on some of these later.
- The Applications section, in true Linux tradition, groups applications according to their use. This, in my eyes, has always been a plus point for Linux over Windows. A very simple idea but very effective. Also, newly installed applications are automatically placed in their respective categories. In keeping with simplicity, most application names are simplified with their use in mind e.g. Movie Player which is actually Totem Movie Player.
A brilliant touch to mintMenu is the search field at the bottom. When you enter text here the list of applications is filtered finding what you are looking for. If you know what application you are looking for you could type its name, Firefox for example. But if you don't know the name of the application you could also type the task you wish to perform! For example, typing hardware gives you Device Manager, command gives you Terminal, spreadsheet gives you OpenOffice Calc, etc. Although it is not all-inclusive, it is a handy feature for newcomers.
Further, entering something and then hitting Enter opens the search application and searches your home folder for the string you have entered, even searching inside documents, logged IM conversations, contacts, and more. This uses an indexing service called Beagle that runs continuously in the background. I am not a big fan of such non-essential applications that run continuously in the background and eliminate their need by organizing and naming my files properly. So I usually turn Beagle off and use the command line interface (CLI) based search tool called slocate. However, I have seen situations when it can be useful and I have used it before. Point being that it all boils down to choice.

Networking
In today's world a computer not networked is like an airplane without wings - you're not going to get very far without networking. If your network is a wired Ethernet one with DHCP (automatically assigned IP addresses), Linux Mint should have already set everything up for you nicely. Some ISPs require you to configure a static IP address. You will need the following information about your connection - your IP address, Subnet mask, Gateway address and DNS server address.

Open the Control Center and click on the Networking button which will take you to the page with the network configuration tools. Select the first tool labeled Networking. It will prompt you to enter the administrator's password. The tool opens with a tab displaying all your networking hardware. Select Wired connection and click Properties.

Set your connection as Static IP address from the drop-down list, enter the settings appropriately, tick Enable this connection and accept the settings.

Then select the DNS tab and enter your ISPs DNS server address in the first row and hit Enter. Some ISPs may have more than one DNS server and you can add them by clicking Add which will create a second field for entering a DNS server. Repeat for other DNS servers. Click Close and you should be done! Fire up Firefox and try browsing your favorite website or at least one that will be up for sure. My default is the Google homepage. If it does not work, you could try rebooting.
If you use a Wireless connection, Linux Mint comes with a specialized configuration tool, mintWifi, and a comprehensive guide to get it working. Enter the following location in the Firefox address bar while in Linux Mint to access this guide file:///usr/lib/linuxmint/mintWifi/index.html If you are relying on an internal dial-up modem for Internet, then the solution is slightly more complicated. You can follow the Ubuntu HowTo to try and get it working. Linux's problem in this area is not due to its shortcomings but rather the refusal of hardware manufacturers to provide drivers for them. This is why the community is fighting for open sourced drivers. The dedicated Linux developers have even offered to make the drivers for free! Slowly but surely the community is making advances in this field.
If you are still facing problems do not hesitate to ask questions on the multitude of community supported help sites. There is a forum that is supported by and dedicated to Linux Mint. See the links section at the top right of my blog for my favorite Linux forum. Friendly and helpful people abound in the Linux community and it is on the shoulders of these giants that Linux stands.
Updating

I am sure by now you have seen a little orange square and a pop-up informing you that updates are available for Linux Mint. Until we got the network up and running there was no way to update your OS. Since we've now got access to the Internet, we will proceed with updating.

This is a no-brainer and all it requires is clicking the orange icon and entering your administrator's password. This opens the Software Updates dialogue that shows you what updates are available, categorizes them according to importance and tells you how big the download is. You have the option of deselecting updates but unless you are restricted by your Internet connection, it would be unwise to do so. Click Install Updates and the application downloads, installs and configures everything just right.

Sometimes when core system updates are made, as is the case with the first Linux Mint update, you will be required to restart your computer for them to take effect. The Update Manager will inform you when this is necessary and the orange icon is replaced with a blue reboot icon.
The beauty of the Update Manager is that it automatically keeps track of available updates without any input from you. When updates are available you will get a visit from the little orange icon and will have to follow the same steps. So your system is always fitted with the latest versions of software, patches and fixes. As I said, its a no-brainer!
Mounting Windows Partitions
Here I am writing pretty much blind and from speculation. This is because I do not have Windows installed on my computer as you may have gathered from my first post. I suppose Linux Mint mounts your Windows partitions during the install and everything should be setup properly. The default mount points for the partitions are /media/hda1, /media/hda2 and so forth. Linux Mint also creates links to the partitions on your Desktop labeled hda1, hda2, etc.

However, if your partitions are not mounted, a tool is provided that will enable you to do so. It is called mintDisk and can be found in the menu under Applications>Administration or in the Control Center under the Hardware tab. Once you start mintDisk you will be prompted for the administrator's password and mintDisk opens up. There are fields available for configuring various options but unless you know what you are doing it is better to leave them alone and simply click OK. If the partitions are not mounted immediately, they will be after the next reboot. Again, I apologize but I have no way of testing this first hand.
mintDisk will mount your NTFS and FAT32 partitions with read and write permissions. Practically what this means is that you will be able to browse, open, modify, create or delete files and folders in your Windows partitions i.e. you will have full access to them.
Installing NVIDIA and ATI Graphic Card Drivers
Both Windows XP and Linux Mint come with a wide range of drivers for various graphic cards. While these will give you basic functionality, in order to get the most out of 3D accelerated cards you will need to install the drivers provided by the manufacturer. As you may know, the most popular graphic card manufacturers on the market today are NVIDIA and ATI. You will have to know which one you have (NVIDIA or ATI) in order to install the correct driver. If, like me, you have a low end graphics card, you will not need to install any other drivers as they are well supported with Open Source drivers. These low end cards include SiS, Intel and others which escape my memory right now - generally anything not NVIDIA or ATI.
Since I do not have an NVIDIA or ATI card, I cannot give you a first hand account of what you should do. But apparently it is as simple as most of the other tools in Linux Mint albeit a little different. The tool in question is Envy. Linux Mint (at the time of writing) comes with an older version (0.8.x). The newer version is way too easy to ignore so I'll guide you as far as I can using that.

First we will get the new version from the author's website. You can read through the brief description of Envy to have an idea of what this brilliant tool does. Envy was written for Ubuntu but since Linux Mint is dedicated to maintaining compatibility with Ubuntu, it will work fine. The download section follows the description of Envy (as shown in the screenshot). Linux Mint 2.2 Bianca is based on the latest version of Ubuntu which is Ubuntu Edgy Eft 6.10. Simply go with the latest version of Ubuntu since that is what Linux Mint is based on. Soon (April 2007) it will be Ubuntu Feisty Fawn 7.04.
There are many downloads available but you are looking for the latest *.deb file. At the moment you will find it under Package for Ubuntu Edgy Eft 6.10. The file name (now) is envy_0.9.1-0ubuntu3_all.deb but always go for the latest stable version. Click on the download and Firefox will ask you what you want to do with it. Select Open with Gdebi Package Installer.

Once Gdebi opens it (administrator's password required), it will inform you that an older version is installed and recommends you install software from the Linux Mint repositories. I would recommend the same but we'll make an exception this time - close the dialogue and click Install Package. Gdebi will then provide you with a list of required dependencies which it will have to download. Accept to do so. When the installation is complete, close Gdebi.

Now we run Envy. You will find it in the menu under Applications>System Tools and it will require the administrator's password. Select Install the NVIDIA driver or Install the ATI driver as appropriate for your graphics card. Click Apply and if I am not mistaken everything should be handled 'automagically!' I am not sure because I do not have the hardware, but Envy may ask you for some information such as your screen resolution, monitor specifications like frequencies and the like. These you can get from your monitor's manual or run a quick Google search. When Envy provides you the option of restarting the X server, do so. This should take you back to the login screen and you should see the NVIDIA or ATI logo before the login screen (unless things have changed since I had my Geforce2). If not, you could try rebooting.
Synaptic Package Manager
New users to Linux usually try to do things as they would in Windows. This is most often seen in program installation. Most go hunting on the Internet for sites from which to download software they need. Usually they end up going to the project's homepage, downloading the tar.gz file and then usually get stumped on installing it from command line. Many a time they also run into what is known as dependency hell. On the contrary, application installation in Linux is meant to be painless thanks to the plethora package managers available. Linux Mint uses Debian's apt-get package manager. Synaptic Package Manager is one of the available graphical user interfaces (GUI) of this powerful package manager.
Synaptic Package Manger is in the menu under the System section and is labeled Install Software. To run it you will need the administrator's password.

The interface is divided neatly into three fields. On the left there is a list of categories of software grouped according to various criteria. There are four grouping criteria which can be selected by clicking on the buttons on the bottom left - Sections, Status, Search Results and Custom Filters. The top right field contains the list of packages in the category selected in the left field and their status. The bottom right field gives a short description of the package selected in the top right field. Synaptic Package Manager contains a database of all the packages available for Linux Mint, including those not installed on your system. Browsing through the database, you will see that the amount of free software available to do almost any task imaginable is truly mind-boggling!
The easiest way to find a an application or package is to use the search tool. Click the Search button and a small dialogue opens with a field to enter your search term and a drop-down list telling it where to search. If you know what package you are looking for, select Name from the list and run the search. If you want to perform a task but don't know what application you should install, select Description and Name from the list and run the search.
For example, I needed an image editor to crop and resize the screenshots for this post. So I ran a search for image editing in Description and Name. This gave me a substantial list of matching packages. You will notice that some packages also have the Ubuntu logo next to them. This indicates that these packages are officially supported by Ubuntu and will most probably work perfectly. Among the officially supported packages in my search result, the descriptions showed that the gimp package is what suited what I was looking for the most (I confess, I knew that already...) Installing is just a matter of Right-clicking on the package and selecting Mark for Installation.

If additional packages are required, a dialogue opens informing you what other changes are required for things to work properly. Click Mark to accept the other changes. You will see the package highlighted as marked for installation.

Then click Apply. A dialogue will open which will give you a summary of changes to be made including the total size of packages to be downloaded and the space that will be used by the installed packages. Click Apply again and wait for it to download, install and configure everything for you.

You will be informed when the installation is complete and if there have been any errors. You can now close the package manager and you will find your newly installed application in the menu - under Graphics in the case of GIMP. Simple, isn't it!
__________________________________________
If everything has gone well so far, you now have a computer running a pretty, stable, secure, convenient and free OS:
- equipped with a wide range of software for all common computing tasks
- with access to the Internet,
- updated with the latest software, patches and fixes,
- with full access to your Windows partitions,
- with the latest and best drivers for your graphics cards
- with the knowledge to install any other application you may need.
This basic setup should have you well on your way to being productive in your new Linux Desktop. In my next post I will talk about some of the most commonly used applications, fine-tuning and enhancing your experience in Linux. Till next time, take care and be nice!
Sunday, February 25, 2007
A Beginner's Guide to Dual Booting Linux Mint and Windows XP
Hello everybody!
This post is a first for me of this type. A friend of mine is interested in trying out an Operating System (OS) that I have a habit of promoting quite a bit. You guessed it, it is Linux we are talking about. But he is unsure how to go about it and is not really ready to get rid of Windows. Yet. And I understand him. Moving to a new OS can be unnerving and would be easier if it is done in phases. I promised I would help him, but he is in another country and so I decided to make a post out of it. Instead of just telling him what to do, it is always better to know at least a bit of what you are doing. In this spirit I am going to explain as simply as possible how we are going to go about this. Hence the considerable length of this post. So here we are. Welcome to my first Linux guide - 'A Beginner's Guide to Dual Booting Linux Mint and Windows XP'
What is Linux Mint? This is a rather new distribution that is based on the very famous Ubuntu Linux distribution. Linux Mint, in my opinion, is supposed to be easier for newcomers to Linux as most of the bells and whistles including proprietary software is supposed to work out-of-the-box. And in its latest incarnation, Linux Mint 2.2 Bianca, things just got a lot better!
Enough chit-chat, lets get you using Linux Mint. First, you will have to download the install CD image (LinuxMint-2.2.iso) from here. It is 685MB, so it will take some time. You can verify the integrity of the file you have downloaded by downloading the small LinuxMint-2.2.md5sum file as well and following these instructions. This is not an obligatory step though. Then, you will have to burn this image file to CD. This does not mean just adding the LinuxMint-2.2.iso file and burning a data CD. Here and here are two websites that explain how to do this in Windows. I recommend that you burn the CD at the slowest speed possible to avoid read errors during installation. After you are done burning there should be two folders on the CD named casper and isolinux, and a file md5sum.txt. If not, you have done something wrong and the CD will not work.
In all my messing around with installing various distributions, I have never faced a scenario where I lost all the data on my hard drive. And I have done enough messing around. However, you are always better safe than sorry. So, I would recommend you backup all the data on your computer that you cannot afford to lose. I am just avoiding law suit here. No really, backup.
Now you will have to make some space on your harddrive for Linux. Linux Mint needs an absolute minimum of 3GB but I would strongly recommend at least 5GB. With hard drives as huge as they are today you have no excuse. So make sure you have got at least 5GB free space on one of your Windows partitions. The more, the better. Then run Disk Defragmenter and defragment your entire hard disk. This step is so that all the free space is located in one big chunk and not spread out in little bits. This will also take some time. Now, I am not sure how it is in Windows since it has been a while since I used it, but I think you should not use your computer while defragmenting otherwise it starts defragmenting from the beginning each time Windows writes to the hard disk. Linux avoids this whole problem by not allowing the hard disk to get defragmented in the first place. Clever, huh. Once you are done with this, we can move to the fun stuff - installing Linux Mint!
Put the Linux Mint CD you have burnt in the CD/DVD drive and reboot. You may have to set your BIOS to boot from CD first before the hard disk. On booting from the CD, the first screen you will see is the boot options screen below.

Just hit enter, sit back and watch the pretty boot splash as Linux Mint starts up. When everything is loaded you will be greeted by a very attractive desktop that can only be appropriately described as mint! Have a look.

Linux Mint is a Live CD. This means that it boots into a functional OS that runs entirely from the CD. And while in this state you can use it without making any changes to you hard disk. The disadvantage is that you cannot make permanent changes. Each time you reboot all changes are lost. Also, depending on the amount of RAM you have the Live CD is slower than an OS installed on the hard disk. So you can play around with it as a Live CD if you are just trying to see what Linux Mint is all about. But we're not here to play around, we're here to dig into the real stuff! See the Linux Mint icon on the desktop labeled Install? Double click it and we'll be on our way with the installation.

The installation dialogue pops up. The first thing I noticed is on the bottom left it says 'Step 1 of 6'. 6 steps?! Is that how easy installing Linux has become? You bet it is! If we were not going for a dual boot setup, any sort of guide would be totally irrelevant. But don't worry, setting up the dual boot isn't hard either, you'll see. Back on track. The first screen is self-explanatory. Choose the language you want for your final system and click Forward.

The second step is just as self-explanatory as the first. Simply choose your time zone from the drop-down list. Or optionally you may click on your region in the world map, and the map will zoom in allowing you to select your city directly. Then click Forward.

Now it's time choose your keyboard layout. You can test your keys in the field below the lists (as I have kindly demonstrated). This is so easy... Why does this need a guide?

Who are you? No, we don't want your philosophical rant... just enter your full name and the name you want to use to log in. Enter your password twice, and a name for your machine. The account created here will be the administrator account with full control of the OS. I will talk about user accounts in more detail in a soon-to-come post... Forward...

Guess what! We've reached the 'hard' part - disk partitioning. We don't want to erase the entire disk, so we choose the second option. We're doing this manually! Forward.

This opens the partition editor application. It will scan all your hard disks and display the present partitions and details about them. If you have more that one physical hard drive then you can switch between them using the drop-down menu at the top right. Your master drive is usually first i.e. hda or sda. The slave will be hdb or sdb. And the partitions are numbered as hda1, hda2, hda3 and so on.
If you are attentive you will notice that my hard disk is divided into three partitions - hda1 is my linux-swap partition, hda2 holds my main installation of Ubuntu Linux and hda3 is my test partition which I use to play around with other Linux distributions. But in this case it is an empty NTFS partition, the file system which Windows XP uses. I am not about to delete my Ubuntu partition just so I can show you how to resize an NTFS partition. So imagine that hda3 is the partition in which you freed 5GB (or however much) for Linux at the beginning of this guide. If you are thinking in terms of C:/, D:/, E:/, etc drives in Windows, there is no sure correlation between that and the Linux hda1, hda2, hda3, etc naming system. I suggest going by the size of the partitions and the free space available in each one to know exactly which partition you are going to resize. Right-click on the partition you wish to resize select Resize/Move. The following dialogue will pop up.

There are a number of ways you can define how you want to resize your partition. The easiest way is just to type the number of megabytes you wish to have for Linux Mint in the last input field where it says 'Free Space Following (MiB)'. As I said 5GB minimum. So you can enter 5000 there. I have less than 5000 in that field, but I am the teacher here - I am allowed to cheat! Actually, I am not. You will see soon enough. The partition editor will not make any changes until you tell it specifically to do so by clicking the Apply button. So for now click Resize.

As you can now see, the NTFS partition has been reduced and there is now some unallocated space after it. This is where Mint is going to stay.
Next is whether you create a primary or extended partition. This depends on how many partitions you already have on your hard disk and what kind they are. A hard disk can have a maximum of four primary partitions. If your partitions are named between hda1 and hda4, they are primary partitions. hda5 and above are extended partitions. So if you have one or two primary partitions you can create primary partitions as you can make two more for Linux. Otherwise, you will will have to create extended partitions which allows a much higher number of partitions.
Every Linux installation needs a swap partition. It is the equivalent of the Windows paging file. Think of it as an extension of your computer's RAM. The general rule is that the size of your swap partition should be the amount of RAM on your machine multiplied by 1.5. However, nowadays with the size of RAM getting very huge, the size of swap doesn't need to be as large. I would set 512MB as a maximum for desktops. Linux Mint recommends a minimum of 256MB. I would second that. Let us make some swap space for Mint. Click on the unallocated space and then click the New button at the top left to create a new partition.

Simply type the amount of swap space that you want in the 'New Size (MiB)' field. For an idea, I have 256MB RAM and my swap space partition is 384MB. This much has been more than adequate for my computing needs. I don't need another swap partition - Ubuntu and Mint can both use the one I already have. The space for the swap partition is what I took out of the 5GB earlier when I 'cheated'. Then choose if it is going to be a primary partition or an extended partition appropriately from the drop-down menu and then select linux-swap from the other drop-down menu. Click Add.
Now we will create the partition where we are going to install the actual OS. Click on the remaining unallocated space and then click on the New button at the top left.

Make sure this partition fills the entire unallocated space - the 'Free Space Preceding' and the 'Free Space Following' fields should both be 0 (zero). Again select primary or extended partition appropriately and then choose a file system in the lower drop-down menu. Linux Mint defaults to ext3 which is tried and tested. I prefer reiserfs which is newer and has some performance advantages over ext3. Take your pick. After all, that is what Linux is all about - freedom and choice! Go ahead... click Add.
Have a look at the pending operations in the partitioning application window. Check and see if your partitions are the way you want them to be. There's no turning back after this. Click Apply!

Oops wait... a warning pops up... click Apply again!

And success! Click Close.

Finally, we reach the end of our lengthy step 5 - Partition mount points. Verify that the partition you created for Linux Mint is mounted at /, the swap partition as swap. The rest go under the /media/hd* mount points according to their partition numbers. I am not sure if NTFS partitions are mounted here by default as I deleted my NTFS partition. I dont need or want it anyway. If not, there is a tool to do this later on. Also check that the / and swap partitions are marked for reformatting and the rest are not. That's it! Bravo, you are done with partitioning! Click Forward!
[EDIT] I have received some feedback that at least one person has faced a situation where the Windows NTFS partition was assigned to be mounted at /media/hda1 and the installer warned the user that proceeding would cause him to lose all the data on that partition. After a little searching the solution he found was to change the mount point of the Windows partition by replacing /media/hda1 with /windows in the above dialogue. This solved the problem and the installation and dual booting went on smoothly.
[EDIT] If you do not wish to allow Linux to access your Windows partitions, delete the mount points in the above step so that the fields under Mount Point are blank for the respective Windows partitions.

The final step! This is more of a summary of what the installer will do. The only option here is choosing the location of GRUB, the boot loader. GRUB is the first thing you will encounter when you boot your computer. It will provide you with the option of starting either Linux Mint or Windows. Don't change anything here. Most probably it will work just fine. Now bravely click Install!

The installation will take about 20-25 minutes. So, you can go and do whatever it is you do when you've got nothing to do. I fixed myself a midnight snack - eggs and baked beans... No, its not what Linux people eat... It's what lazy people eat. At least nobody is troubling me today!

Alas we have reached the end of our journey! On the other hand, your journey has just begun. A journey to trouble-free computing! I actually timed myself during this install. Of course, this is not the first time for me, but I did do it leisurely plus I took some of the screenshots you see here. From booting with the CD to rebooting took me a few seconds shy of 55 minutes! Not bad for the so-called complicated, only-for-geeks OS. And on top of that, everything worked fine - from playing mp3 files to websites loaded with flash. Even this post, including all the image editing was done on Linux Mint! But I'll leave that for another post. In the mean time if you need any help, go over to the Linux Mint forum and the friendly people there will surely be happy to help.
You go ahead and give that Restart Now button a good whack and enjoy!
[EDIT] My follow-up post on Linux Mint
Sunday, August 27, 2006
I want that Ubuntu T-shirt!
 Hi all!
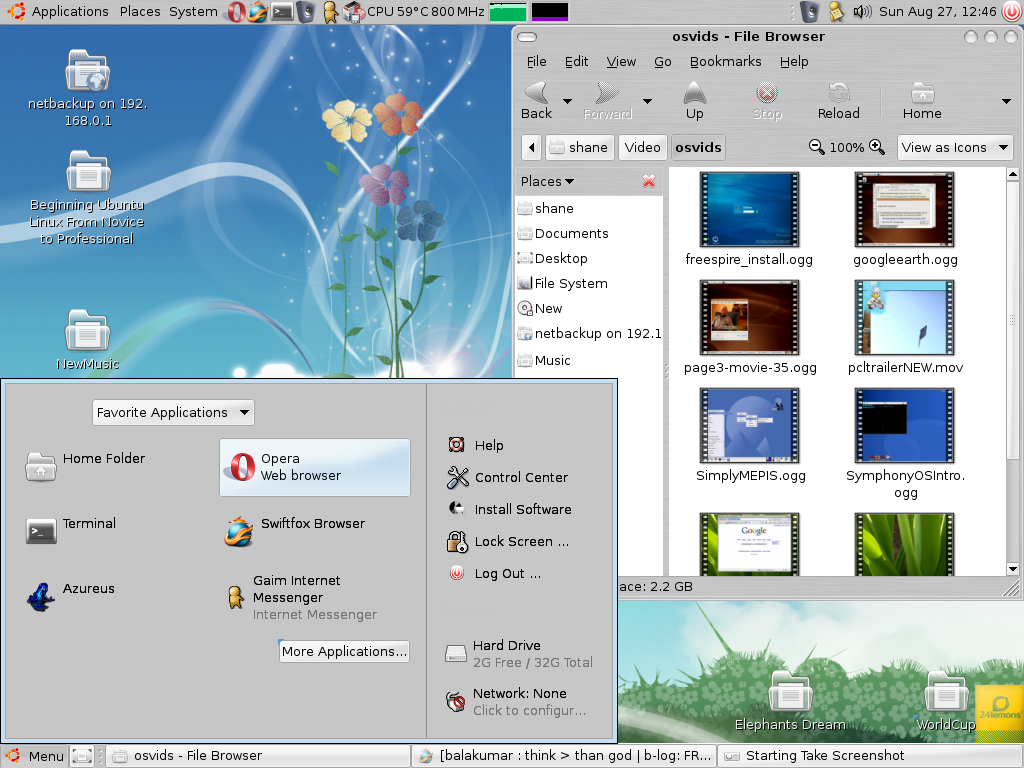
I'm back :-) You all might be wondering what that picture is doing up there... well there is a bit of a story behind it. You see, I am a member of the ubuntulinux group on Google groups, and today I read one of the threads which is about a guy, Balakumar, who is giving away 2 Ubuntu t-shirts and cds (I think) for free! But there is a bit of a catch to it... prospective recipients are to explain why they love Ubuntu and provide a link to a screenshot of their desktop. So you see where I'm heading with this :-) .
So this here is a screenshot of my desktop. I am running Ubuntu Dapper Drake which is Ubuntu 6.06 in simpler terms. I've been an avid Linux user since July 2004, beginning with Mandrake, then Mandriva, but so far Ubuntu has definitely been the most complete desktop distribution I have encountered. Needless to say, I will never go back to Windows, ever. With a desktop that looks as pretty as mine up there, why would I? Pop-ups, viruses, security holes, crashes, blue screens, spyware, malware, you-name-it, are vague memories in the distant past.
If you havent tried Ubuntu, whether you are a Linux veteran or never seen anything close to it, you should definetely give it a shot. Now I dont want to give you great expectations. Most of the limitations of Ubuntu (and Linux in general) are due to proprietary hardware and software... and hence has nothing to do with Linux, but the companies unwilling join the Open Source wave. The transition may be difficult, frustrating or, if you're savvy, a breeze. But if you are like me, once you have passed through the fire you will be left wondering what you were thinking using Windows :-)
So now you want Ubuntu? Well, join Balakumar's competition, or you can go straight to the source and get them to send you some cds completely free!
OK. That's it for now... Hope I win this competition :-D.
Subscribe to:
Posts (Atom)